LilyBakes

Look for us on Facebook! LilyBakes. Please "Like" us today!
Showing posts with label Lily. Show all posts

Tuesday, March 3, 2015

My favorite Sugar Cookie Recipe

My Favorite Sugar Cookie Recipe


Last Fall, I bought a cookie press with the image of a Skeleton. I searched for a good Sugar Cookie recipe. It was tough to find one that wouldn't melt/spread as it baked-thus losing the image.

Skeleton Sugar cookies

I tried various recipes. To my disappointment, in order to get the image I had to sacrifice taste. While the skeleton image is cool- I still wanted a yummy cookie.  Later, for the Christmas season, I held two cookie baking parties and again we experimented with Sugar Cookie recipes.  This time the goal was not about the press but merely something the kids could decorate and be tasty. 

I was satisfied but still not in love with the cookies. (oh and let's not forget Frosting. I'm always looking for a good frosting recipe!)

Then, I went to brunch where I was lucky enough to sit across someone who worked in a bakery. (I could not WAIT to talk to her about baking! It's fascinating to me and I was excited to pick her brains!

But back to the sugar cookies. She said I should look for a Cream Cheese Cookie recipe. She said that's what they always use at her bakery. oooh I dashed home to look it up.
I found this recipe:

cream-cheese-sugar-cookies

The website not only covered this delicious (and EASY) cookie recipe but it also contains the best Royal Icing recipe (ALSO easy) I have ever found.

Here are the cookie ingredients and directions:

Dough
  • 1 cup soft butter
  • 8 oz. cream cheese
  • 1½ cup sugar
  • 1 egg
  • 1 tsp vanilla
  • ½ tsp almond extract
  • 3½ cups flour
  • 1 teaspoon baking powder


  1. Blend butter and cream cheese. Add sugar and egg. Mix in remaining dry ingredients and blend into the creamed mixture. Chill for 1 hour. Roll out dough on floured surface until ¼ inches thick (a must!) Cut with desired cookie cutter shape and bake at 375 for 8-10 minutes. Let cookies cool.


Here are the icing ingredients and directions.

  • 2 cups powdered sugar
  • 2 tablespoons soft butter
  • ¼ tsp almond extract
  • Milk to desired consistency


    1. Mix all your frosting ingredients and add some food coloring if desired. For these apple cookies, I used Wilton's Leaf Green and Red Icing colors. Frost cookies when cool. Add any desired decorations. I used some red sanding sugar on the red frosting.


    (I didn't use food coloring as directed from the original website-she was creating apples and I wanted fluffy white clouds and a white frosting under the sprinkles. You can certainly add any color you wish to match whatever shape you cut out!)

    I hope you will try these cookies. I have made them twice now and can not stop myself from eating them!!!  
    These cookies are from my daughter's 4th birthday. The theme was My Little Pony. The Cloud cookies were my favorite though she loved the ones with the sprinkles!  (something for everyone!)

    This recipe is easy, delicious AND holds it's shape. No melting or spreading as you bake. They are truly my favorite sugar cookie recipe. Do you have another Sugar cookie recipe? I'd love to share!! 
    Happy Baking!

    Saturday, April 5, 2014

    Zu-Corny Biscuits via Trader Joe's Cookbook

    Did you know there are SEVERAL cookbooks out that feature food from Trader Joe's? Many books will tell you what to buy at their fun store and then how to turn those into a yummy meal, snack, sandwich or even something to pack for lunch!


    I found this book:  Trader Joe's Pack a Lunch at the library. Hmmmmmm I love Trader Joe's (though I sure wish they had a location closer to us-both locations take planning to go there.)
    I found a recipe called "Zu-Corny Biscuits"   As in-Zucchini and Corn Biscuits. Wow! This combines three things that I love: Zucchini, Corn and baking biscuits!!

    Gotta try this!

     Dry mix


    Grate zucchini and add it into the "wet" mixture


    Wet and dry combined.

    Here's a video of me showing the various ingredients:
    (And the Book!)


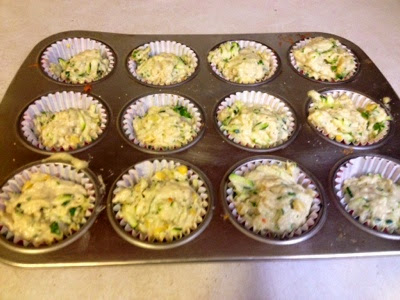
    Before I pop them into the oven.

    Tips- make sure you have the correct oven temperature! I had the oven set at 350 degrees. However, the recipe calls for 400!  It took twice as long! I couldn't figure out WHY they weren't getting done.
    Oh! Yeah, read the recipe!


    Here is one of the Zu-corny Biscuits. They have been an easy, take along type snack the past two days. I think I will make it again and if so I will: 
    1. Get the cheese recommended in the recipe. Muenster is too mild and the flavor is completely lost.
    2. Use more onions, more zucchini and more kale. And more corn too! I would definitely UP the veggie factor. 
    These are fast and easy to make and would be PERFECT for a brunch or work event. You can easily make them ahead of time (but let's face it who doesn't love that "hot out of the oven" taste? 
    They keep well and would definitely work well packed for lunch. (I should know! I packed two for myself at work!!)  

    Hope you try this recipe. 
    :)

    Thursday, March 27, 2014

    Pumpkin Pie Muffins

    While at the library, I spotted this cookbook. I like to find books that have recipes that Lily might enjoy helping me make AND like to eat.  I found a Pumpkin Pie Recipe and was excited because it calls for Whole Wheat Pastry flour.  If you saw yesterday's post Mac and Cheese with Quinoa Noodles You remember that I had been looking for this flour and wanting to find recipes that call for it.
    So! To find a recipe that needs whole wheat flour and the can of pumpkin puree I had in my pantry made me go for it!!


    Amazon.com has the book for purchase. I found this copy at the library. I may have to buy it..

    First up, mix the dry ingredients:

    1 cup all-purpose flour
    3/4 cup whole wheat pastry flour
    1 1/4 cup sugar
    1 1/4 teaspoon baking powder
    1 teaspoon cinnamon
    1/2 teaspoon salt
    1/2 teaspoon ground nutmeg
    1/2 teaspoon ground cloves
    1/2 cup raisins.

    Combine wet ingredients:
    2 large egg, lightly beaten
    1 cup canned pumpkin puree
    1/3 cup canola oil (I used vegetable oil)
    1/3 cup water
    2 tablespoons raw pumpkin seeds. (I didn't have any so I skipped this ingredient)


    Add pumpkin mixture to the flour mixture and stir until just blended. Spoon into muffin cups. I use an ice cream scoop for the easiest distribution.


    Bake 20 mintues at 350. Muffins are done with a toothpick comes out clean. 
    (Our oven is woefully slow….my muffins took 30 minutes)

    The recipe made 19 muffins. On the second batch, add some water to the empty cups. This will help the muffins bake more evenly.


    Lily Belle just had to hold the pedestal


    Sunday, March 9, 2014

    Lily's Little Mermaid Birthday Party!


    Miss Lily. 3 years old


    Miss Lily Belle Turns 3!

    Lily Marie turned 3 and wanted a party fit for a Princess-Princess Ariel to be exact!!
    So, Mommy hit up Pinterest.  No better way to start the creative juices flowing!!

    The first  fun thing I found was an idea of "Oyster" cookies. I used Nilla Wafters, a yogurt raisin for the "pearl" and frosting to hold it all together. Easy to make but messy!  My tip-hold up the bottom wafer, squirt the frosting and then place the pearl and the top piece on and then place them in the dish for safe keeping. If you try and squirt the frosting (I used a Ziploc back with one corner cut off as a piping bag) while it sits in the tray, you have less control and it will tip over and make a big old mess.

    Next up was to make cupcakes! I used a recipe from my favorite Children's Cookbook-

    I used the "Easy Chocolate Chip Muffins recipe page 86 for the cupcakes. They aren't technically "cupcakes" but they are SO yummy that noone cares!

    Top off with some frosting and a Swedish Fish and Viola! Mermaid food!


    Another fun treat that I made was Sand Dollar Cookies!  Here is where I got the recipe:


    For Lily's cake I decided to make something similar to the cupcakes but on an individual and slightly bigger scale. This recipe is also from the Children Baking Cookbook. I used the Chocolate Chip Cookie Cake, Page 46.
     My husband did the frosting! He is better at it than I am!


    Next to turn my attention to decorations!!

    If found a HUGE Ariel wall mural from Amazon for $6.00!! (Though I noticed the price has gone up!) You can buy it from The Oriental Trading Company for $5.00 but you have to pay shipping and handling.


    Next I bought two colors of blue streamer and a table cover. I tasked my husband with setting up the decorations. I think he did a pretty awesome job!


    These items plus the red tissue paper medallions (on clearance from Wal Mart for $0.19 each!) and the entire decoration budget was less than $13! 

    Me and my big 3 year old!

    One activity we had was to make necklaces with salt dough stars. The girls first painted them "Ariel colors" and then let them dry. Later we came back to string them and add their names.


    Picking letters for our names!


    While their starfish dried-each girl put on their very own Mermaid tail.  My WONDERFUL friend, Debra Johnson made these for the girls!  How fun! They crossed under the arms and then criss cross over and tied behind their head.  


    The girls had a ball doing a "Mermaid Parade"  Around and around they went in their swishy tails!


    Amid some amazing new toys, Lily got this handmade gift from my dear friend, Debra. At night, Lily tries to figure out how to hug all 5 pillows at once.  Ultimately, I think it will help her to learn how to spell her name more efficiently!


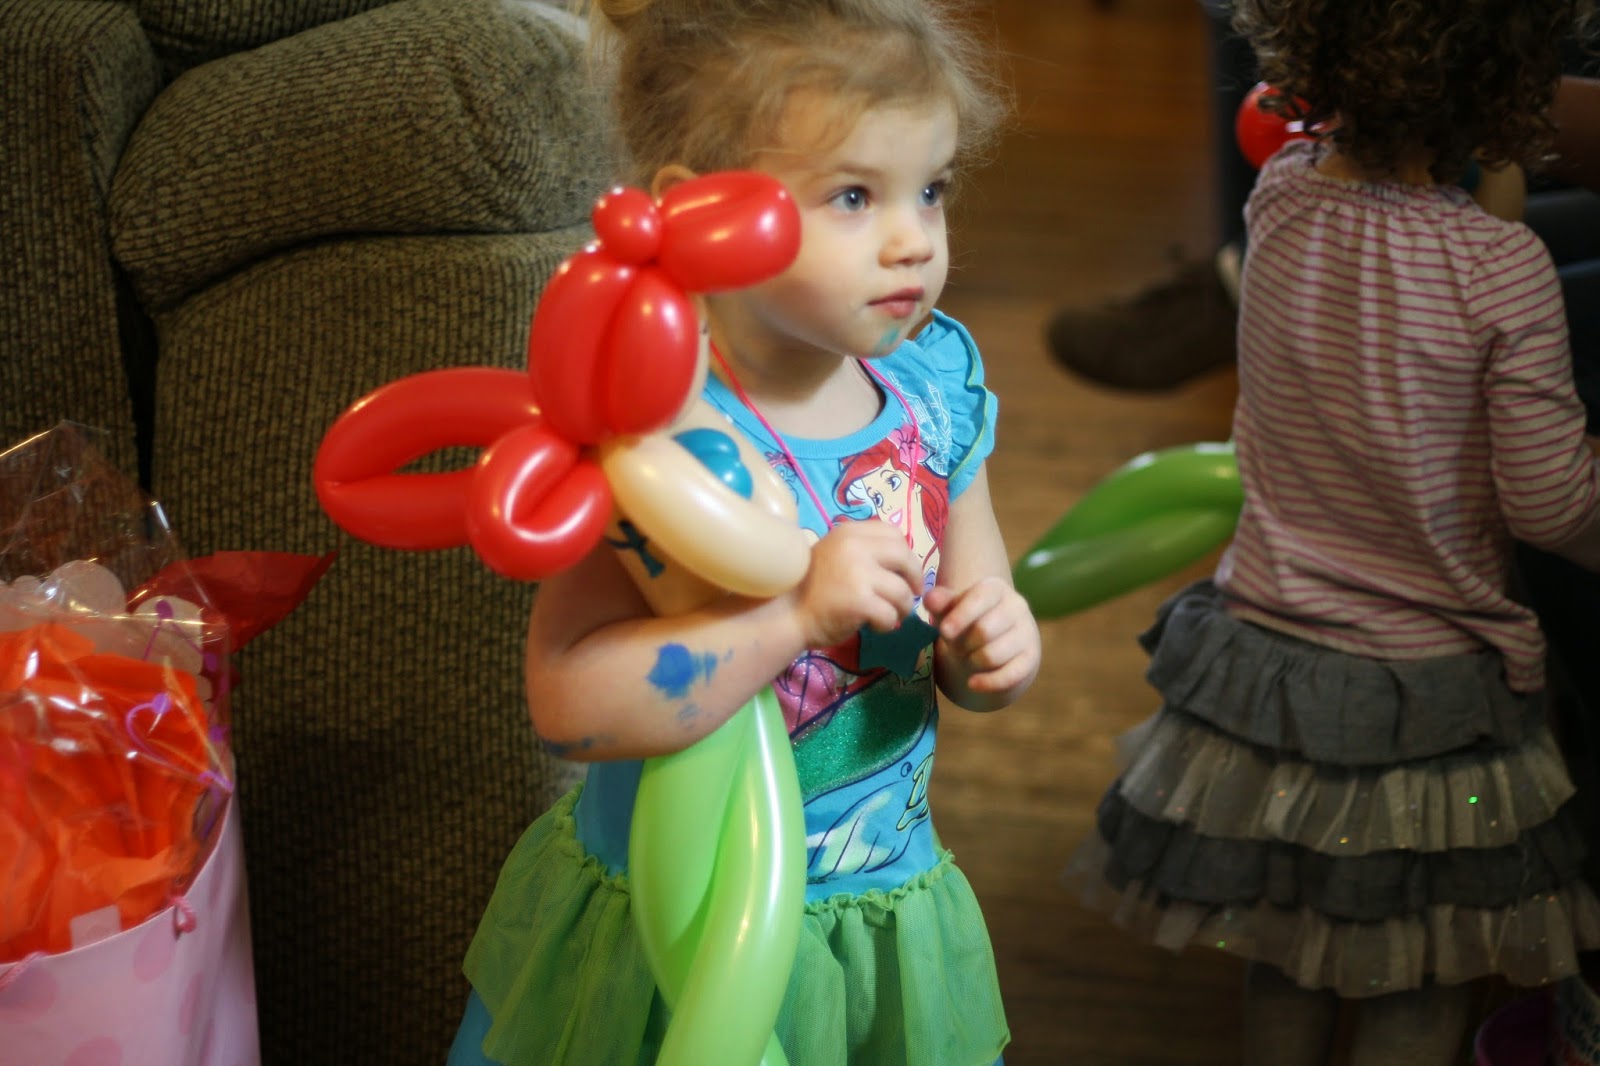
    Each girl got an amazing Ariel balloon animal AND a balloon Princess Wand!  


    Tuesday, January 14, 2014

    Soft Pretzels

    Living in the Midwest-we experienced some pretty nasty cold weather and frigid temperatures this winter. One on particularly cold morning, my neice and I decided to make soft pretzels. What could be cozier than the flaky, warmth of a nice soft pretzel?


    So we got out my favorite baking cookbook "Kids Baking" by William-Sonoma. The instructions are easy to follow and in the end you and your kids feel like a Rock Star!


    This is my niece, Alex helping my daughter Lily roll out pretzel dough. The recipe calls for several steps. First you make the dough, and then you knead for 10 minutes. (The first time we did this we did the kneading by hand. That's a looooonnnnnggggg 10 minutes! The second time we used this recipe i got smarter and used my mixer and the bread making hook) After the bread is kneaded and sits for a while, THEN you get to do the fun part of rolling out the pretzels and twisting their happy little middles.


    After you twisted all your pretzels, then you have to boil them in water for 30 seconds each side. This gives it the chewiness. (or maybe the brown outer crust? I'm just making a guess here....) Finally you can bake your doughy friends. Don't be surprised if your family is lined up anxiously awaiting their arrival to the cooling rack!

    Here's the recipe:
    http://www.williams-sonoma.com/recipe/pretzels.html

    Monday, October 10, 2011


    SWING!

    Today is Oct. 10, 2011. 
    We took a bag full of tomatoes, a pepper and squash to Paul and Vera Herman.  They live over on Delhi and are always excited when I bring them fresh veggies. After we had a short little visit, I pushed Lily's stroller along the bike path back home.  I decided to stop at the small playground just past Como Park and see if Lily likes to swing.

    Well!  Right away I could tell that LIly LOVED it!  Her little arms and legs dangled over the swing and she felt free of weight and ground.  Her little face lit up with each arc.  Unfortunately, I knew this would be wonderful for her, but not so good for me. I'm really senstive and get motion sick very easily. I can't swing or even watch someone swing.  My poor stomach was rolling for over an hour after this.

    However, it made sweet Lily so happy and I love seeing her happy!  I may just have to suck it up and deal with the nausea now and again just to see her sweet face smile this big!!

    Saturday, September 24, 2011

    Lily Tattoo


    Lily was definitely NOT named for the flower.  In fact, she was named for the character, Lily on "How I Met Your Mother."  For the longest time, we couldn't agree on a name. I wanted "Sunny" but Matt didn't.  Toward the end of my pregnancy, I was on bed rest. We watched a lot of HIMYM and one day I commented that I really liked Lily's character. Then, during my baby shower I noticed that the baby bedding I had registered for was from the "Lily Collection."

    We had a name!!  Since Lily was born, I've been thinking about getting her name as a tattoo or maybe some flowers to represent her. I researched all form of Lilies.  Daylilies were too common, and Stargazer lilies remind me of my Grandma Julie's funeral. (her favorite flower) and the Calla Lily is not appropriate etc. While researching lillies, I found this:

    LILY OF THE VALLEY: Return of happiness, purity of heart, sweetness, tears of the Virgin Mary, you've made my life complete, humility, happiness, love's good fortune. The legend of the lily of the valley is that it sprang from Eve's tears when she was kicked out of the Garden of Eden. It is also believed that this flower protects gardens from evil spirits. Also known as the flower of May.

    I like the Lily of the Valley. The meaning is perfect and it's closely tied to May 1st. That's the day we got married!  So, I finally make a plan to get a tattoo.  It HURT but I love it!

    Nap time blow outs

    Thursday afternoon, (Sept 22, 2011) I put Lily down for a nap. She slept for an impressive three hours!  When I went in to get her, she was happy to see me, as usual.  Lily will half roll and look up at you and SMILE.  Then, she rolls the other way and hides her face. It's super cute. However this routine was cut short when I got a look at her tummy. MAJOR blow out!  There was leaked poo all over. On her onesie, pants, and even the sheet.  ick!

    I carefully lifter her out and plunked her on the changing pad. Quickly I pulled off the soiled clothes and diaper but WOW did this little stinker need a bath. But, I didn't want to get dirty myself so I was trying to carefully hold her out away from me. However, Lily had different ideas. She wrapped herself around me like a monkey hanging on for dear life. Her arms and one leg were wrapped right around me and she even pressed her head onto my chest.  Guess I was in for a change of clothes!  lol